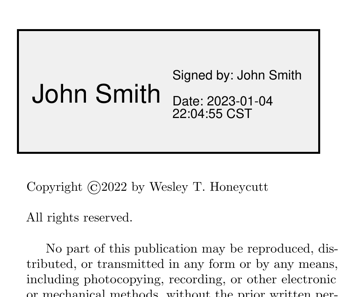

apt-get Ubuntu 22.04 LTS "Jammy Jellyfish" is the oldest release with the digital signatures enabled. I recently switched to this LTS release — I wait longer than most to switch since I prefer KDE, and new releases often have a "growing pains" period for the environment. When I finally tried to hack together a the Okular digital signatures in Ubuntu, once updated, I found the documentation wanting. New features like this often have sparse documentation until someone makes a post for the masses (like this one).
TL;DR skip to The Code section at the bottom.
pacman package nss is not available in apt-get. If we apt search nss, we return too many packages to be useful. Instead, let's focus on the command Arch recommends called certutil. Sure enough, an Ubuntu man page exists for certutil. The second line of that page tells us what provides certutil. Now we are in business!
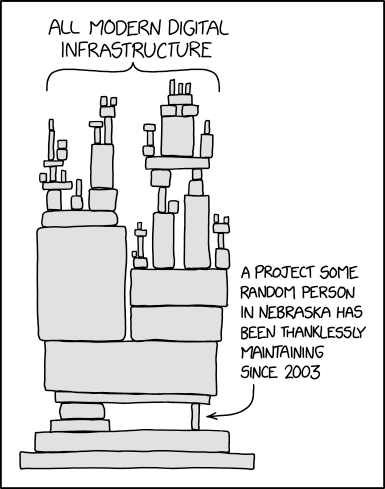
 Courtesy of XKCD's Randall Munroe
apt.
sudo apt-get update
sudo apt-get install libnss3-toolsif ls $HOME/.pki/nssdb/cert* 1> /dev/null 2>&1; then echo "db exists"; else echo "You need to install db"; fimkdir $HOME/.pki/
mkdir $HOME/.pki/nssdb
certutil -N -d sql:$HOME/.pki/nssdb-N argument.
Now we get to the meat of the operation. We need to create a self-signed certificate with the appropriate trust information. We will then refer to this certificate later in Okular. Edit and use this one-liner with your information:
certutil -S -s "CN=John Smith,O=Business or School,OU=Nerd department,L=Townsville,ST=State,C=US,[email protected]" -g 2048 -d sql:$HOME/.pki/nssdb -n my-ca-cert -x -t "Cu,Cu,Cu" -p 405-555-5555 --email [email protected] -m 1234certutil to do the following:
-S tells certutil you want to create a brand new entry.-s tells certutil the subject to use for this new entry. This subject line should match standard forms for a certificate signing authority (see here). Specifically, I have use the comma delimited fields:
CN=John Smith - The "Common Name" of your certification entity. For a personal user, this should be your name.O=Business or School - The "Organization Name" that your CN belongs to. For official business you should use your business or university. For personal usage, try using "Personal" as your organization.OU=Nerd department - The "Organizational Unit" that your CN belongs to at your O. Again, for official business, you should use your official department like "IT dept" or "School of Meteorology". For personal use, I omitted this.L=Townsville - Your "Location" is the town or city you want this to be registered in.ST=State - If appropriate, include your "State" or province here.C=US - Your "Country" should be the official two-letter country code. Check the list if you are unsure of yours.[email protected] - The email address you want associated with the cert.certutil to fail. For example, I used [email protected] as was suggested by the wikipedia entry for subject line codes. However, this field is unexpected by NSS, and it will throw a fit if you try to include it. For more detail than you could possibly care about, see the exact specifications for the subject field.-g tells certutil what size to make the key in bits. You need to choose a multiple of 256 for this number. This argument uses 2048 as the default, so it is optional as written. However, I have included it in case you want to increase the size to something like 4096, which is becoming more standard. Beware that large key sizes may not be supported by all services, and it may induce downstream errors. Smaller key sizes down to 512 are possible, but that is usually a poor choice for a key.-d tells certutilthe directory to use for certificate storage. Here, I have used the system default (which I created in the steps above) at $HOME/.pki/nssdb. Note that this code includes a sql: prefix. This prefix is necessary on all modern systems as modern NSS stores keys in SQL databases rather than plaintext. You must declare sql: any time you call the database.-n tells certutil the arbitrary name that you would like to assign to this entry. It is useful to name the entry something meaningful, such as my-ca-cert in the example where we are creating a Certificate Authority certificate.-x tells certutil that you want to self-sign the certificate. This is very important, as someone must "sign" the certificate to vouch that you are truthful. Often, self-signed certificates are not acceptable as they are not verified by a trusted third-party. Companies exist which offer this as a service for a yearly fee (which I can't afford). If you are doing something serious which requires trusted signatures on documents, you should consider investing in a trusted key signing. However, self-signing is "good enough" for most purposes of demonstrating that you read and agree to the document, which is what most users need for PDF digital signatures. Be aware, that the self-signed cert will be flagged when a user inspects the signature. For example, when viewing the signature in adobe. There will be a note that says something similar to Adobe cannot verify the legitimacy of the signature. For most things, no one cares. A signature is not a "secure" method of signing as discussed in the history section above. If you recipient cares, then you need to graduate beyond what this post can teach and get a third-party verification.-t tells certutil what "trust" to assign to this certificate. This is a nuanced security issue that I, honestly, do not understand. I know that we want this to be treated as a trusted certificate authority (hence the C portion). I also know that I want this entry to be associated with a private RSA key (u). This is repeated three times. Once for SSL, email, and object signing. For PDFs, we only really care about object signatures. RTFM for more info on options.-p tells certutil the phone number of the signer. We want this to be associated with our real number for trust verification if necessary.-m. The serial number is only unique in your system, so if you only have a few of these, just smash in a random integer.
certutil. Notably, this is how you check your work and fix mistakes.
certutil -d sql:$HOME/.pki/nssdb -Lcertutil -d sql:$HOME/.pki/nssdb -L -n my-ca-certcertutil -D -d sql:$HOME/.pki/nssdb -n my-ca-cert$HOME/.pki/nssdb. You will see your available certificates in the database. At some point during this step, you will be required to restart Okular.

